![]()
Written by: Aaron Cuellar, Staff Writer
Real Life Potion Making
DELICIOUS: Two recipes for and a brief history of birria, a delicious Mexican festival dish, which has taken on new life due to a number of exceptionally creative chefs around the world.
Everybody has at some point or another wanted to be a witch. The idea that one, through will, hard work, and attention to detail, can alter their surroundings with the snap of their fingers is undeniably alluring. Unfortunately, that kind of power will forever exist behind the silver screen, or within the pages of novels, but I’ll let you in on a little secret. There is a real-world equivalent to the potion making aspect of witchery: the cooking of soup. I firmly believe no more potent a charm exists than a meticulously crafted stew, the most powerful among them being birria. No love draught could ever have stronger effects than this rich, savory, spicy, deeply complex dish, and the fact that it is fairly easy to make is a definite bonus. Theatrics aside, in order to do this soup justice, it is important to first understand its history.
The story of birria begins in México, specifically the state of Jalisco. The word “birria” itself loosely means “garbage” or “mess”, which may seem confusing until one understands the soup’s traditional main ingredient. These days, it’s much more common to see beef in place of anything else, but the original dish was made from what Spanish colonists in México thought of as a low-class meat: goat. When cooked normally, goat tends to be tough, lean, and unappetizing, but the native Mexicans had the idea to slow cook it in a sauce derived from locally sourced peppers. The result? Incredibly flavorful and impossibly tender chunks of meat for a very low price.
A few centuries later, in the 1950s, the next major leap forward was taken. According to legend, a taquero named Don Guadalupe Zárate moved to Tijuana and started selling birria. His recipe was somewhat unpopular in his new city, so he decided to localize it a bit. Zárate added more liquid, increased the cook time, and switched from using goat to beef. Thus, the modern birria was born. With the addition of more liquid, a rich broth known as consome became a staple of the soup. The extra fat from the beef deepened the flavor and increased the yield per pound, making it even cheaper. This form of birra would eventually become known as Tijuana-style and has spread throughout México, becoming by far the most popular version of the dish in the 1980s, and is still just as influential today.
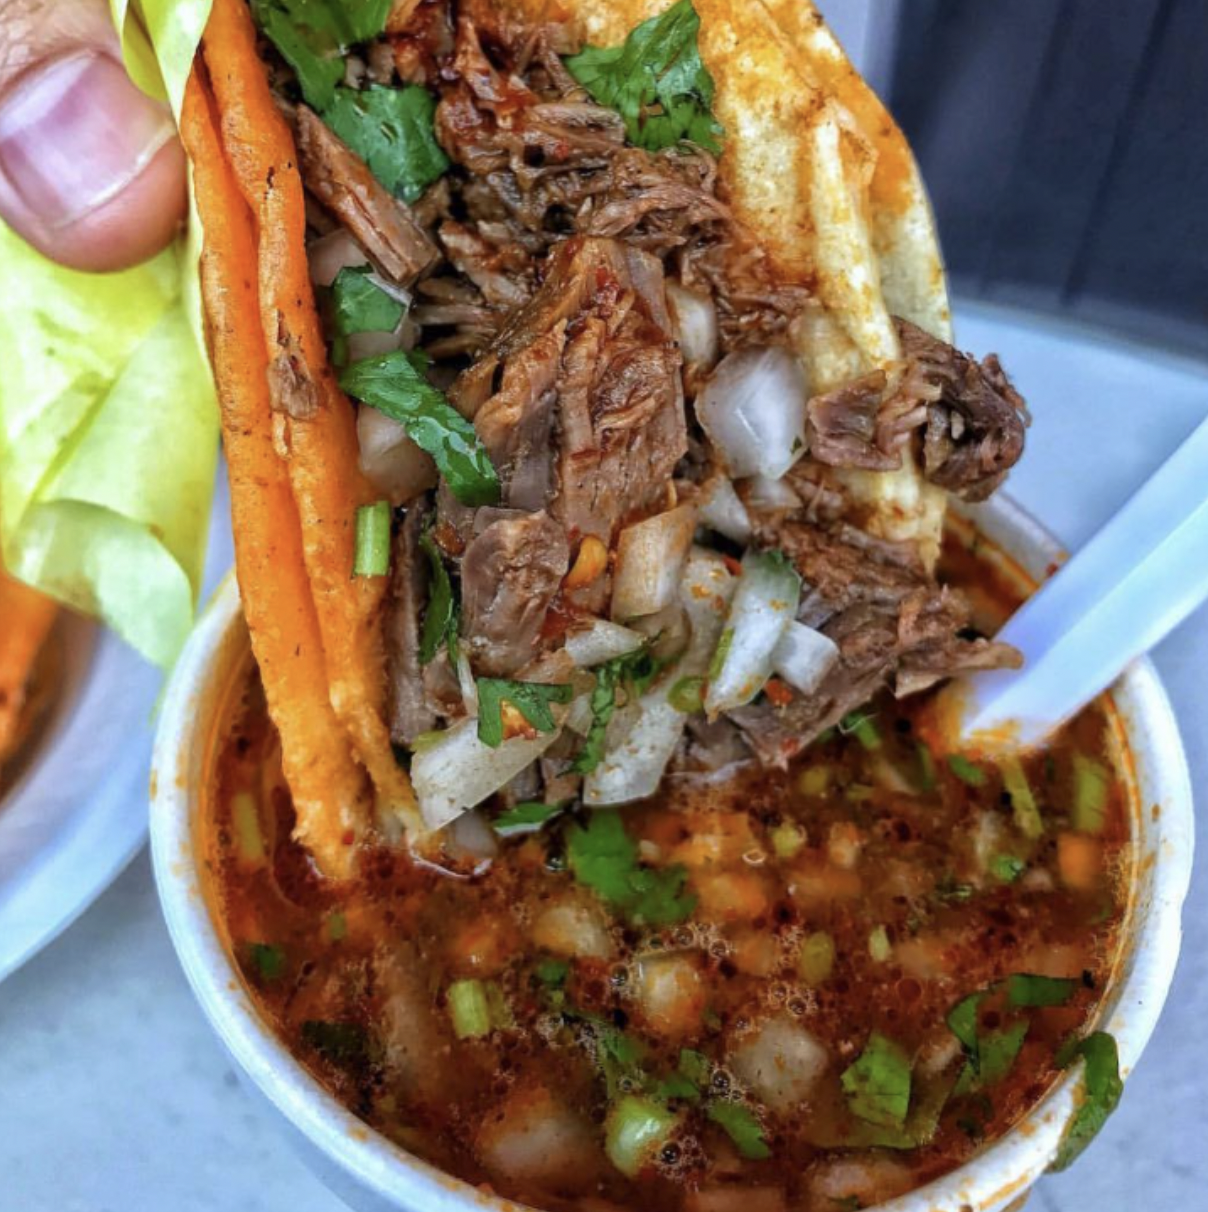
There is one final important evolution, however. In the early 2000s, México became a popular destination for vacationers from Southern California. At the same time, taquerias around Tijuana started selling quesabirras; quesadillas or mulitas filled with birria and served with a cup of consome on the side for dipping or drinking. Gradually, these recipes began to bleed across the border, eventually landing in Los Angeles. Birria was still fairly new to the United States and rapidly becoming popular. The novel consumption method only served as a catalyst for what was already happening. One fateful day, a food truck called Birrieria Gonzalez posted a photo on Instagram of a quesabirria being dunked into a beautiful cup of consome. They may not have been the first to post such a photo, but this one in particular went viral practically overnight.
These days, birria is a staple, quesabirrias are the world’s favorite taco, and enterprising chefs all over the world have tried their best to innovate. From birria burgers to birria ramen, everyone seems to have a different take on the dish, myself included. Below are two recipes for birria, the first being ultra-traditional, having been passed down the generations within my family. The second is my personal take on the dish and is much more complex, but in my humble opinion, much tastier!
Traditional Birria:
Ingredients:
- 10 pounds beef chuck roast
- 20 dried California chilis, deseeded, destemmed
- 16 fresh garlic cloves
- 6 teaspoons of salt, plus more to taste
- 2/3 of a cup of vinegar
- Water
- Optionally add lemon, diced onions, diced cilantro (as garnish)
Method:
- Steep your chilis in boiling water for about 10 minutes, until soft to the touch.
- Place the garlic, vinegar, salt, and chilis into the jar of a blender. Measure out 4 liters of water, including the water your chilis steeped in. Add as much of the water as will fit into the jar of your blender and reserve the rest. Blend until smooth and foamy.
- Heat a very large pot until smoking hot, taking care not to damage it. DO NOT add oil. Add your beef in batches, do not crowd. Each piece of meat should be able to fully touch the bottom of the pot at the same time. Cook for two minutes, flip, repeat. Reserve to the side until all the beef has been browned on both sides.
- Add about a quarter cup of the blended chili mixture to the pot, keeping it very hot. Scrape the bottom of the pot thoroughly with a wooden spoon or spatula for about a minute, then add the rest of the blended chili mixture and meat, as well as any extra water you may have reserved.
- Bring the pot to a simmer, then cover, cook on low for 8 to 10 hours, flipping your meat once halfway through. If the stew starts to dry out, don’t be afraid to add some extra water.
- Once the cooking time has elapsed, the stew should be a bright red color, and the meat should shred at the barest touch of a fork. Add extra salt to taste, then serve a large piece of meat in a bowl and ladle a generous amount of consome over it. Top the dish with diced onions and cilantro, lemon on the side. The pot can be left on the stovetop for up to a week as long as you boil it at least twice a day (once in the morning, once in the evening).
Super Pepper Birria (My Personal Recipe):
Ingredients:
- 8 lbs chuck roast
- 2 lbs bone in oxtail
- 24 dried California chilis, deseeded, destemmed
- 12 dried chiles de arbol, destemmed
- 20 cloves of garlic, toasted
- 4 jalapeños, destemmed, toasted (DO NOT deseed)
- 4 serrano chiles, destemmed, toasted (DO NOT deseed)
- 1 cup white vinegar
- 4 large lemons, juiced
- Water
- 8 tablespoons salt, plus more to taste
- Diced white onion
- Diced cilantro
- Corn tortillas
- Good melting cheese, like oaxaca or chihuahua
- Pickled red onions (optional)
Method:
- Steep your dried chilis in boiling water for about 10 minutes, until soft to the touch.
- Place the garlic, vinegar, salt, and all chilis into the jar of a blender. Measure out 6 liters of water, including the water your chilis steeped in. Add as much of the water as will fit into the jar of your blender, reserve the rest. Blend until smooth and foamy.
- Heat a very large pot until smoking hot, taking care not to damage it. DO NOT add oil. Add your beef in batches, do not crowd. Each piece of meat should be able to fully touch the bottom of the pot at the same time. Cook for two minutes, flip, repeat. Reserve to the side until all the beef has been browned on both sides.
- Set the heat to low, add the lemon juice. Stir occasionally until most of the liquid has evaporated, leaving a blackened residue on the bottom of the pot. Don’t worry, it’s not burnt.
- Add about a quarter cup of the blended chili mixture to the pot, set the heat to high. Scrape the bottom of the pot thoroughly with a wooden spoon or spatula for about a minute, then add the rest of the blended chili mixture and meat, as well as any extra water you may have reserved.
- Bring the pot to a simmer, then cover, cook on medium low for 8 to 10 hours, flipping your meat once halfway through. If the stew starts to dry out, don’t be afraid to add some extra water.
- Once the cooking time has elapsed, the stew should be a menacing dark red color, and the meat should shred at the barest touch of a fork. Season to taste with salt. The pot can be left on the stovetop for up to a week as long as you boil it at least twice a day (once in the morning, once in the evening).
For Quesabirrias:
- Cook two tortillas on a flat top, comal, or griddle. Flip once the side facing down has begun to develop dark brown spots. Repeat on the other side.
- Once the tortillas are cooked, top both with cheese and only one with diced white onions, cilantro, and a handful of shredded birria meat. (Note that since it has cooked for so long, you can probably shred the meat with a fork or even the ladle itself fairly easily). Drip a little bit of consome on both tortillas.
- Once the cheese has begun to melt and adhere to the tortilla, take the one without the extra toppings and place it cheese side down on top of the other, so that the cheese, meat, and other toppings are effectively sandwiched between the two.
- Press the mulita down with a spatula. (You can use thoroughly washed and dried hands, too, but be very careful not to burn yourself). Allow to cook for a few more seconds, then flip, and repeat. Transfer to a plate, optionally top with pickled red onions and lemon on the side. Ladle out some hot consome into a small cup for dipping and top it with diced white onions and cilantro. Enjoy!